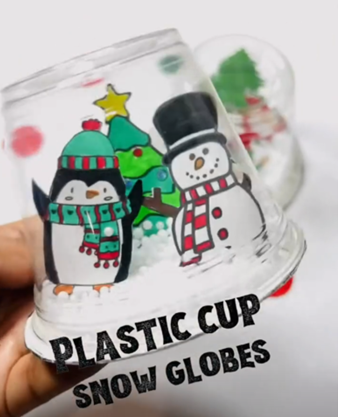
Here is a fun and festive winter activity from December School Year Program! This is a great way to create DIY decorations for the winter season on those cold (and possibly snowy!) afternoons and weekends.
Plastic Cup Snow Globe

Supplies
- Plastic cups
- Cardboard piece
- Styrofoam beads/ artificial snow
- Colored markers
- Scissors and glue( tacky glue)
- Paper winter pictures or make your own trees, snowman and penguin (or anything else!)
Directions
- Take your plastic cup and place it upside down on your piece of cardboard. Trace around the edge of the cup with a marker.
- Cut the circle out that you made on the piece of cardboard.
- Grab your sheet of winter pictures and color them in, if needed. You can also draw or make your own winter themed items, like trees, snowmen and penguins.
- Cut out your winter pictures. Make sure to leave a small piece of the of paper at the bottom of each item/object that can be bent and glued to the cardboard bottom.
- Take each winter item/object and bend the bottom piece so that it is parallel to the cardboard and can be secured with the image upright. Arrange your winter pictures and glue them down.
- Pour a small amount of Styrofoam beads or artificial snow into your plastic cup.
- Put glue around the edge of your cardboard circle.
- Flip the cardboard circle upside down (glue side down) and place it on the rim side of your cup, securing the bottom of your snow globe (cardboard circle) to the top of your snow globe (filled plastic cup).
- Flip it back right-side up, wait for it to dry and give it shake to watch it snow!
Notes
- Click the link below to view video instructions.
Activity idea from: https://pin.it/3B5dlZm

